Essential Photo Editing Techniques to Enhance PhotographsPhoto editing, or photoshopping, allows photographers to enhance photos in many ways from cropping or rotating to creating composite images.
This article is part of a series of articles. Please use the links below to navigate between the articles.
- Introduction to Photography Course - Definition & Types of Photography
- How Cameras Work and Terminology Explained for Beginners
- What is the Exposure Triangle and How Does It Affects Exposure?
- Understanding Camera Shutter Speed for Beginners
- Aperture and Depth of Field in Photography Explained
- What is Digital Photography ISO and Grain?
- How to Understand Camera Lenses and Focal Length
- Essential Photography Composition Rules To Improve Your Photos
- Camera Metering Modes Demystified - Which One To Use
- Camera Shooting and Exposure Modes Explained
- Complete Guide to Flash Photography for Beginners
- When and How To Use A Camera Tripod In Photography
- What Are White Balance And Colour Temperature Camera Settings?
- How to Use Camera Histograms in Photography for Perfect Exposure
- Master These 10 Camera Settings For Your Best Photographs
- Why You Should Be Shooting in RAW - Reasons and Benefits Explained
- Essential Photo Editing Techniques to Enhance Photographs
- Complete Guide to Macro Photography for Beginners
- Beginners Landscape Photography Guide for Stunning Photos
These are some basic tips to help enhance your photographs; the next tutorials will cover composite images where more than one image is used to create a final design.
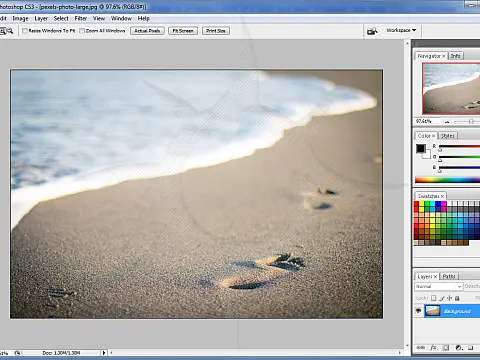
This tutorial is based around Adobe Photoshop, but the techniques can be adapted to most photo editing suites.
Photo Editing Crop and Rotate Tools
The first steps are usually to straighten and crop photos. This can make a huge difference straight away to your photographs. Cropping photos in Photoshop is done by using the Crop tool in the toolbar. From the tool options bar, you can select the various options, including aspect ratio and pre-selecting ratios for print, landscape or portrait. Photoshop then places the crop grid over the image. You can drag and resize by using the corner grabbers. There is a grid which divided the tool overlay into 9 equal segments. This grid is called the rule of thirds. It is best to place key elements in the photo along these lines. The rule of thirds is covered in more detail in my photography composition article in the link.
As with most tools, you can hold the shift key when dragging the corners. This will constrain the proportions of the image and preserve the original aspect ratio.

The second step is to rotate the image. This is especially important for landscapes where there is a definite horizon. To straighten the image you can use the free transform tool from the Edit menu or Ctrl+T. This allows you to drag the corners of the image to rotate.
Photo Editing Brightness/Contrast and Shadows/Highlight
You may need to adjust the brightness and contrast of the image, in case the photo was under or over-exposed, or if you just want it lighter or darker. This can be done from the Image > Adjustments menu, but also adjustment layers. If using the menu tools, there are several options available. Each of which has different effects on the image. Generally, they have sliders to adjust the values and you can preview the changes before applying them. Feel free to play with the different settings here; some of them can create some unique effects.

The usual effects are adjusting the brightness and contrast and also changing the shadows and highlights. Brightness and contrast make the image brighter or darker and also affects how black the blacks are. Shadows and highlights are similar but you have a greater control over how black the blacks are but also how white the whites and all the tones in between. These tools can enhance landscapes, especially skies.
Photo Editing Healing and Repairs
Moving on to some more advanced tools, we can use the spot healing tool, healing brush and patch tool to correct any defects, such as dust marks or scratches, or to even remove elements from a photo all together. The spot healing tool allows you to "paint" over the defect and Photoshop will automatically sample the area around it and automatically "fix" the defect. The healing brush tool allows you to specify where the replacement data will come from, sample the data and merge it to remove the defect. The clone stamp allows you to select a region in the image, and copy that, in airbrush form, over another part of the image. You can also use the patch tool, which allows you to patch over a region in the image. It allows you to draw around a defect and drag another part of the image on top. Photoshop will then sample and merge the two to remove the defect. The secret to doing this properly is to not use too big a brush and take your time. If you rush, Photoshop may start to include the very things that you want to remove.

In my example image blow from Skye in Scotland, there are some unsightly pylons and wires in the photo. The following screen grabs show the various tools removing the unsightly distractions.

The spot healing tool is a good quick fix, but as you can see for large areas you can still just about make out where the tool has computed the sky. There are barely visible lines and slightly blurred outlines. You can reduce this by reducing the brush size and also doing smaller sections, one at a time.

The healing brush tool results in a much higher quality repair. To use the tool you must first specify where the replacement data is. This is done by using the ALT key and clicking on a similar area of the image. As long as the tool is used, data from around this point will be used.
The patch tool allows you to define a selection with a lasso tool, and then drag an existing area of the image into this area which will then be merged in.

High Pass Filter for Details
Another useful tool is the high-pass filter. This is available from Filters > Other > High Pass Filter. To use this filter, you need to create a duplicate of the photo and apply the filter to it. It will then create a very grey image, with some of the details highlighted. You then need to go into the blending options on the layers panel for the filtered layer and select Hard Light. This will really enhance the details, especially in things like grass, stone and walls. Sometimes the effect will be too strong, but you can adjust this by changing the opacity of the layer.
You can see the effects in the example below, the left being the original, and the right having the high pass filter applied.

Saving Images
I would say that it is essential to save your modified image as a copy of the original. Never overwrite or save over the original because there is no way to get the original back later on. If you have lots of layers and adjustments it's best to save it as a PSD file, since the other formats will lose all this extra information. Additionally, saving as a JEPG will lose some detail in the image since the image is compressed and during this compression, the quality will be reduced.
To recap - keep the original safe, do not overwrite it. Save as PSD to preserve layers and keep adjustments for later changes. Save as JPEG only for distribution - sending email, uploading to the web and so on.